> ## Documentation Index
> Fetch the complete documentation index at: https://docs.plaud.ai/llms.txt
> Use this file to discover all available pages before exploring further.
# Web App to Native App
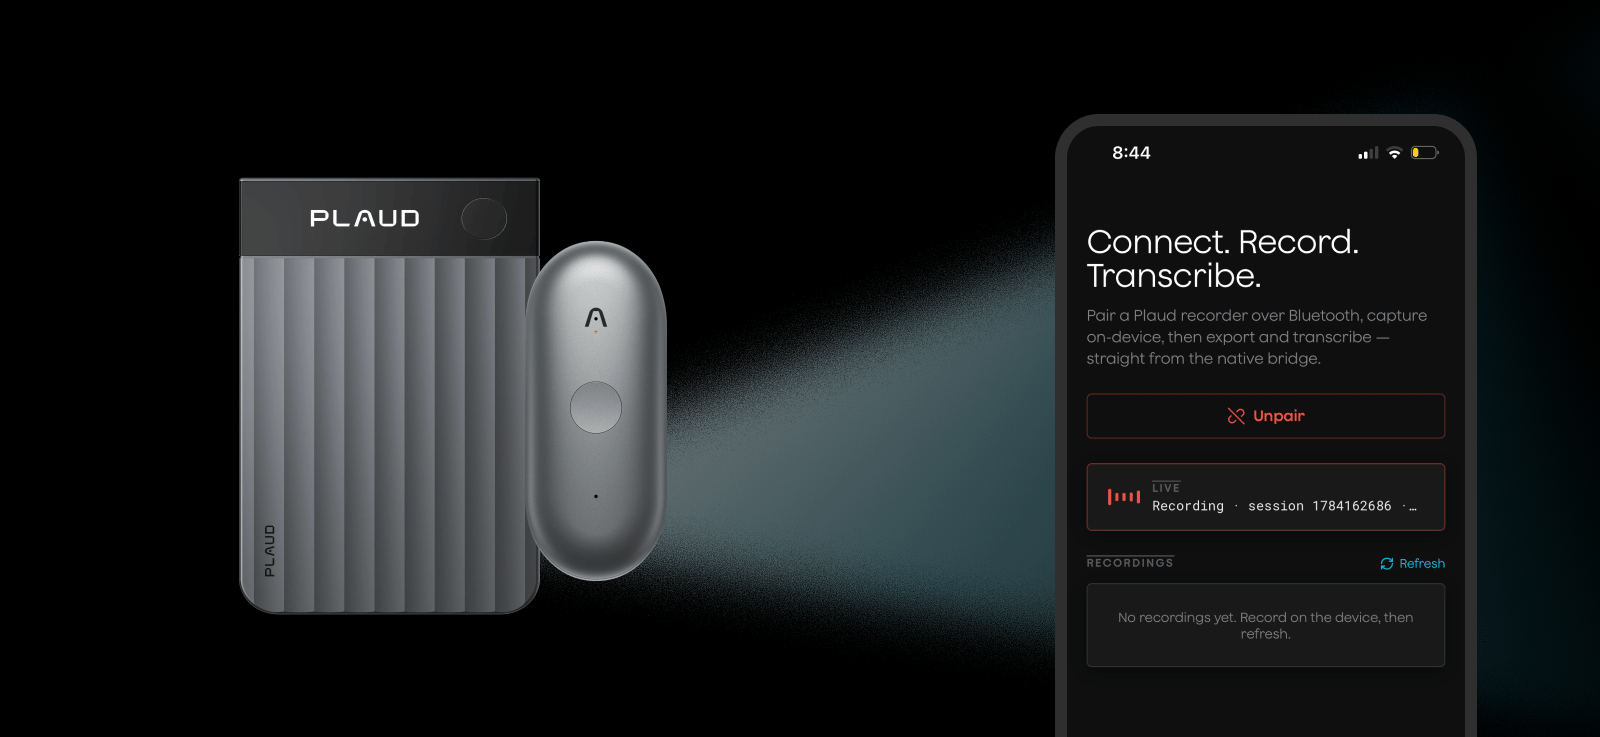
Plaud's iOS and Android SDK can be used through a Capacitor plugin to turn any web app into a native mobile app!
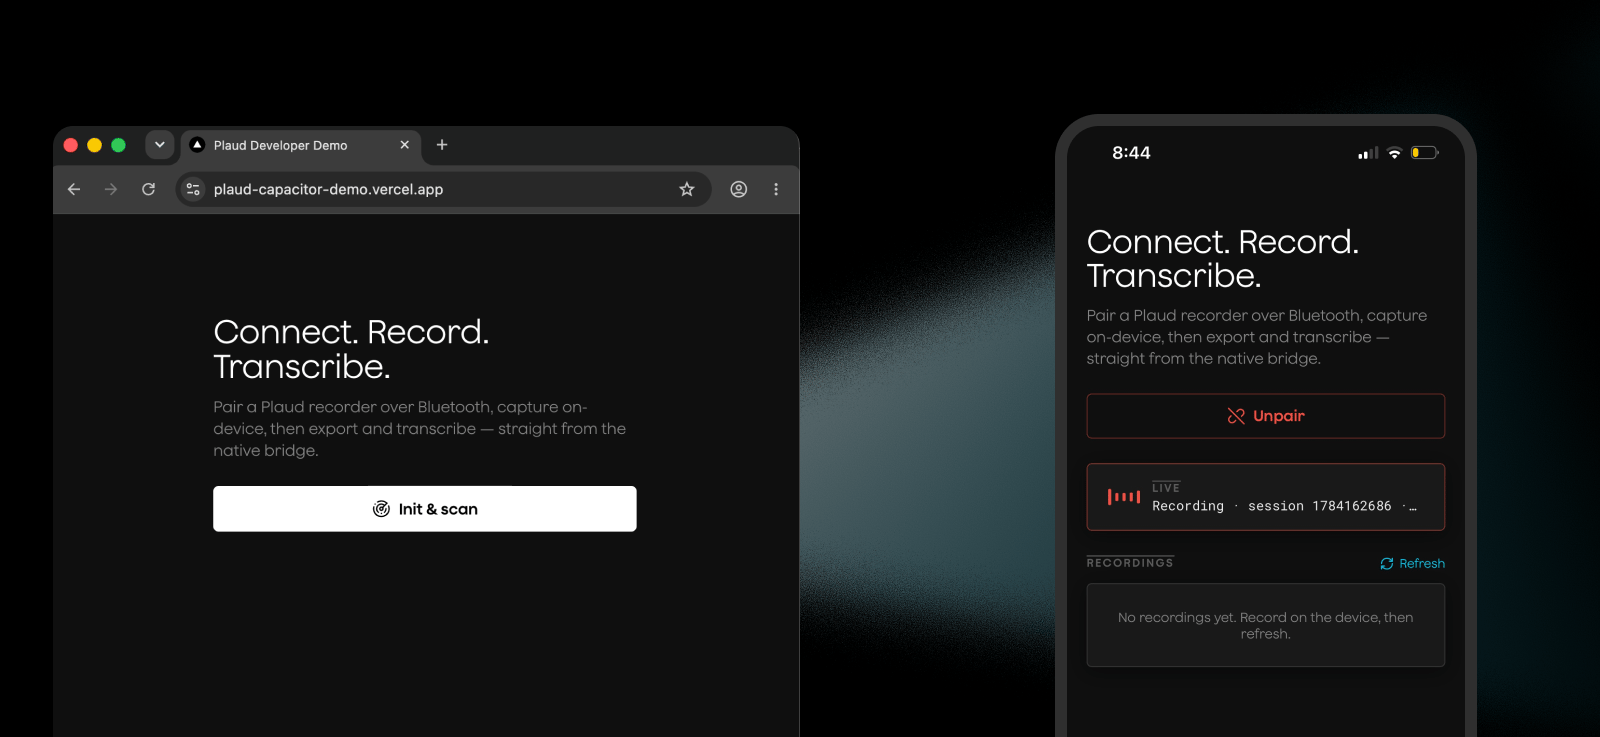 The PlaudPlugin for Capacitor implements the basic methods for:
1. Connecting to Plaud Devices
2. Syncing audio files
3. Transcription
For advanced usage of the Embedded SDK methods for use cases like WiFi fast transfers, we recommend adding more methods to this plugin or using the native [Embedded iOS SDK](/plaud-embedded/ios-sdk) or [Embedded Android SDK](/plaud-embedded/android-sdk) directly
## Video Walkthrough
## How it works
[Capacitor](https://capacitorjs.com/) is a runtime to run web apps on native platforms. It works by wrapping your web app in a native shell, while Capacitor's bridge sends data from your web app to native features like iOS APIs and BLE.
```
┌──────────────────────────────────────────┐
│ Web App (JavaScript) │
│ PlaudSdk │
└──────────────────▲───────────────────────┘
│
Capacitor Bridge
(JavaScript ↔ IPC)
│
┌──────────────────▼───────────────────────┐
│ PlaudPlugin (Swift/Native) │
│ BLE, Files, iOS APIs, Events │
└──────────────────────────────────────────┘
```
Capacitor plugins like the PlaudPlugin still use native swift code (built on top of the [Embedded iOS SDK](/plaud-embedded/ios-sdk)), but these plugins
can be called and listened to using the Capacitor bridge.
## Running the Demo App
The demo app is included in the Plaud Embedded plugin as reference for implementing the plugin in your own app and seeing how everything works.
```bash theme={"system"}
git clone https://github.com/Plaud-AI/embedded-capacitor.git
```
```bash theme={"system"}
cd nextjs-demo
npm i
cp .env.example .env
```
You can retrieve your environment credentials from the [developer portal](https://portal.plaud.ai/).
```bash theme={"system"}
# for ios
npx cap sync ios
npx cap open ios
# for android
npx cap sync android
npx cap open android
```
**For iOS**, make sure to include your Apple developer credentials and certificate in XCode.
The PlaudPlugin for Capacitor implements the basic methods for:
1. Connecting to Plaud Devices
2. Syncing audio files
3. Transcription
For advanced usage of the Embedded SDK methods for use cases like WiFi fast transfers, we recommend adding more methods to this plugin or using the native [Embedded iOS SDK](/plaud-embedded/ios-sdk) or [Embedded Android SDK](/plaud-embedded/android-sdk) directly
## Video Walkthrough
## How it works
[Capacitor](https://capacitorjs.com/) is a runtime to run web apps on native platforms. It works by wrapping your web app in a native shell, while Capacitor's bridge sends data from your web app to native features like iOS APIs and BLE.
```
┌──────────────────────────────────────────┐
│ Web App (JavaScript) │
│ PlaudSdk │
└──────────────────▲───────────────────────┘
│
Capacitor Bridge
(JavaScript ↔ IPC)
│
┌──────────────────▼───────────────────────┐
│ PlaudPlugin (Swift/Native) │
│ BLE, Files, iOS APIs, Events │
└──────────────────────────────────────────┘
```
Capacitor plugins like the PlaudPlugin still use native swift code (built on top of the [Embedded iOS SDK](/plaud-embedded/ios-sdk)), but these plugins
can be called and listened to using the Capacitor bridge.
## Running the Demo App
The demo app is included in the Plaud Embedded plugin as reference for implementing the plugin in your own app and seeing how everything works.
```bash theme={"system"}
git clone https://github.com/Plaud-AI/embedded-capacitor.git
```
```bash theme={"system"}
cd nextjs-demo
npm i
cp .env.example .env
```
You can retrieve your environment credentials from the [developer portal](https://portal.plaud.ai/).
```bash theme={"system"}
# for ios
npx cap sync ios
npx cap open ios
# for android
npx cap sync android
npx cap open android
```
**For iOS**, make sure to include your Apple developer credentials and certificate in XCode.
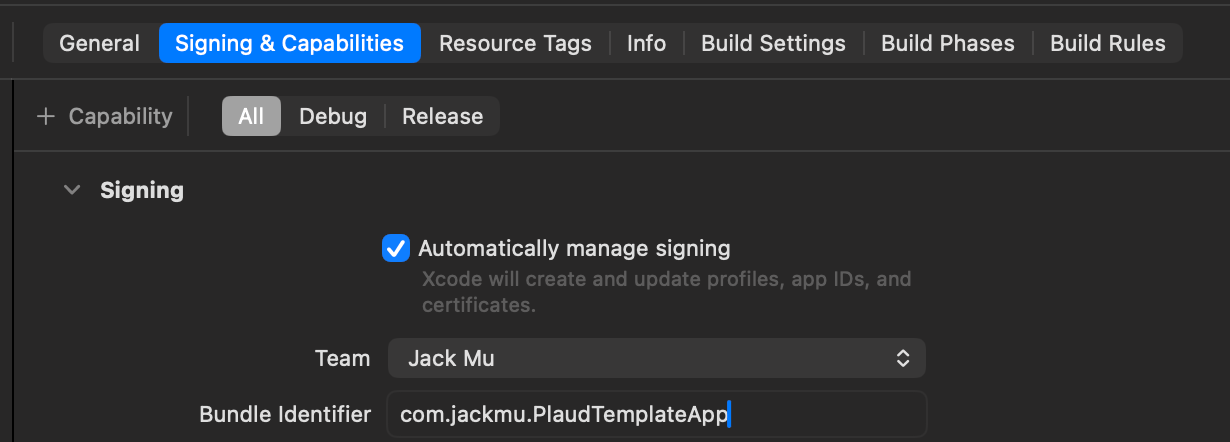 Then **run on a physical device** to test out the demo app with your Plaud devices.
 ## Setting Up Plaud Embedded's Capacitor Plugin
The Plaud Embedded Capacitor Skill has all of the context in these docs so your agent can immediately start wrapping your web app into a native iOS app with Plaud Embedded.
```bash theme={"system"}
npx skills add Plaud-AI/embedded-capacitor
```
### Step 1: Clone our Embedded Capacitor Repo
```bash theme={"system"}
git clone https://github.com/Plaud-AI/embedded-capacitor.git
```
This repo includes:
1. PlaudPlugin for Capacitor runtime
2. Typescript interfaces and utility functions for the PlaudPlugin
3. A sample app with a NextJS application using the Capacitor wrapper to work as a native iOS app
4. Plaud Capacitor Wrapper Skill for agents to implement the Plaud Plugin and the Capacitor runtime wrapper
### Step 2: Setup Capacitor
```bash theme={"system"}
npm i @capacitor/core @capacitor/ios @capacitor-community/bluetooth-le @capacitor/android
npm i -D @capacitor/cli
```
Then initialize Capacitor to setup your Capacitor configs
```bash theme={"system"}
npx cap init
```
Lastly, add ios to your capacitor project and sync your web app
```bash theme={"system"}
//For ios
npx cap add ios
npx cap sync ios
//For android
npx cap add android
npx cap sync android
```
### Step 3: Setup the PlaudPlugin
#### For iOS
Copy the `ios/PlaudPlugin/` framework and paste into the `ios/` directory.
#### For Android
Copy `android/app/libs/plaud-sdk.aar` into your `android/app/libs/` directory.
Then, copy `android/app/src/main/java/ai/plaud/pwademo/PlaudSdkPlugin.java` into your app's
package directory, and **change its `package` declaration** to match your `applicationId`.
#### For iOS
Copy the `ios/App/App/MainViewController.swift` into your `ios/App/App` directory to register the PlaudPlugin.
Your `ios/` directory should look like this:
```
ios/
├── App/
│ ├── App/
│ │ └── MainViewController.swift
└── PlaudPlugin/
├── Package.swift
├── Frameworks/
│ ├── PlaudBleSDK.xcframework
│ ├── PlaudDeviceBasicSDK.xcframework
│ └── PlaudWiFiSDK.xcframework
└── Sources/
└── PlaudPlugin/
└── PlaudSdkPlugin.swift
```
#### For Android
In `MainActivity.java` that Capacitor generated, register the PlaudSdkPlugin class.
```java theme={"system"}
public class MainActivity extends BridgeActivity {
@Override
public void onCreate(Bundle savedInstanceState) {
registerPlugin(PlaudSdkPlugin.class);
super.onCreate(savedInstanceState);
}
}
```
Your `android/` directory should look like this:
```
android/
├── app/
│ ├── libs/
│ │ └── plaud-sdk.aar (copied)
│ ├── build.gradle (edited)
│ └── src/main/java//
│ ├── MainActivity.java (edited)
│ └── PlaudSdkPlugin.java (copied)
└── variables.gradle (edited)
```
#### For iOS
Link `PlaudPlugin` into the App target in Xcode.
Open the project (`npx cap open ios`), then **File -> Add Package Dependencies -> Add Local**,
Select `ios/PlaudPlugin`, and add the `PlaudPlugin` library product to the **App** target (the same way `CapApp-SPM` is already linked).
## Setting Up Plaud Embedded's Capacitor Plugin
The Plaud Embedded Capacitor Skill has all of the context in these docs so your agent can immediately start wrapping your web app into a native iOS app with Plaud Embedded.
```bash theme={"system"}
npx skills add Plaud-AI/embedded-capacitor
```
### Step 1: Clone our Embedded Capacitor Repo
```bash theme={"system"}
git clone https://github.com/Plaud-AI/embedded-capacitor.git
```
This repo includes:
1. PlaudPlugin for Capacitor runtime
2. Typescript interfaces and utility functions for the PlaudPlugin
3. A sample app with a NextJS application using the Capacitor wrapper to work as a native iOS app
4. Plaud Capacitor Wrapper Skill for agents to implement the Plaud Plugin and the Capacitor runtime wrapper
### Step 2: Setup Capacitor
```bash theme={"system"}
npm i @capacitor/core @capacitor/ios @capacitor-community/bluetooth-le @capacitor/android
npm i -D @capacitor/cli
```
Then initialize Capacitor to setup your Capacitor configs
```bash theme={"system"}
npx cap init
```
Lastly, add ios to your capacitor project and sync your web app
```bash theme={"system"}
//For ios
npx cap add ios
npx cap sync ios
//For android
npx cap add android
npx cap sync android
```
### Step 3: Setup the PlaudPlugin
#### For iOS
Copy the `ios/PlaudPlugin/` framework and paste into the `ios/` directory.
#### For Android
Copy `android/app/libs/plaud-sdk.aar` into your `android/app/libs/` directory.
Then, copy `android/app/src/main/java/ai/plaud/pwademo/PlaudSdkPlugin.java` into your app's
package directory, and **change its `package` declaration** to match your `applicationId`.
#### For iOS
Copy the `ios/App/App/MainViewController.swift` into your `ios/App/App` directory to register the PlaudPlugin.
Your `ios/` directory should look like this:
```
ios/
├── App/
│ ├── App/
│ │ └── MainViewController.swift
└── PlaudPlugin/
├── Package.swift
├── Frameworks/
│ ├── PlaudBleSDK.xcframework
│ ├── PlaudDeviceBasicSDK.xcframework
│ └── PlaudWiFiSDK.xcframework
└── Sources/
└── PlaudPlugin/
└── PlaudSdkPlugin.swift
```
#### For Android
In `MainActivity.java` that Capacitor generated, register the PlaudSdkPlugin class.
```java theme={"system"}
public class MainActivity extends BridgeActivity {
@Override
public void onCreate(Bundle savedInstanceState) {
registerPlugin(PlaudSdkPlugin.class);
super.onCreate(savedInstanceState);
}
}
```
Your `android/` directory should look like this:
```
android/
├── app/
│ ├── libs/
│ │ └── plaud-sdk.aar (copied)
│ ├── build.gradle (edited)
│ └── src/main/java//
│ ├── MainActivity.java (edited)
│ └── PlaudSdkPlugin.java (copied)
└── variables.gradle (edited)
```
#### For iOS
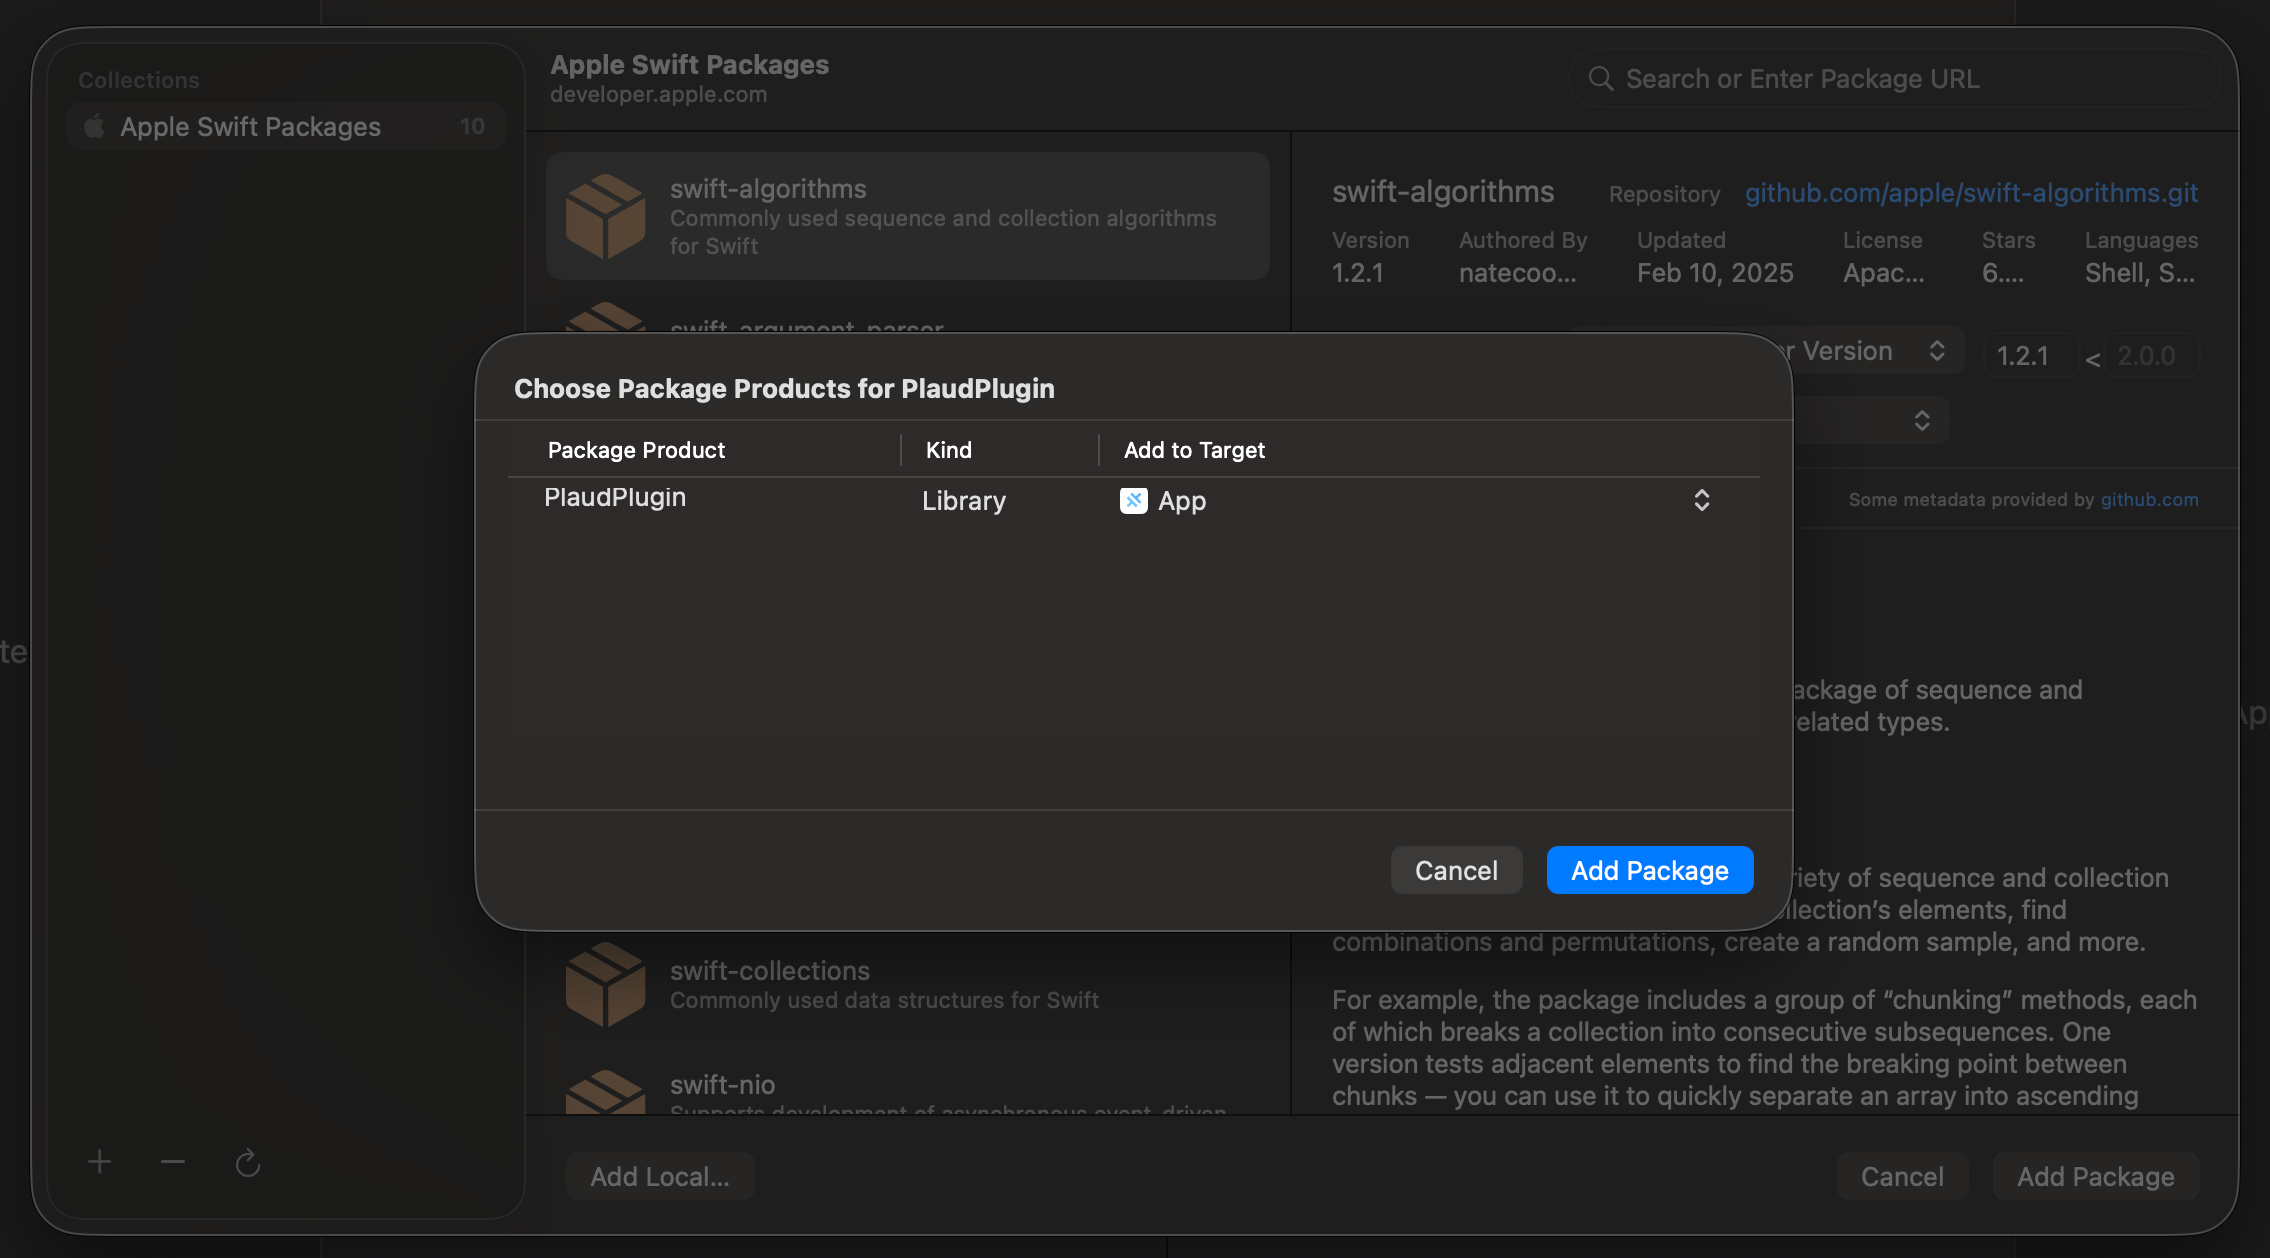
Link `PlaudPlugin` into the App target in Xcode.
Open the project (`npx cap open ios`), then **File -> Add Package Dependencies -> Add Local**,
Select `ios/PlaudPlugin`, and add the `PlaudPlugin` library product to the **App** target (the same way `CapApp-SPM` is already linked).
 Then, add the Bluetooth entitlement in `ios/App/App/Info.plist`
```xml theme={"system"}
CFBundleDevelopmentRegion
en
...
NSBluetoothAlwaysUsageDescription
Uses Bluetooth to connect and interact with peripheral BLE devices.
UIBackgroundModes
bluetooth-central
```
#### For Android
Declare all dependencies as the SDK does not come with a `pom.xml` file.
```gradle theme={"system"}
dependencies {
// Stock template says ['*.jar'] — '*.aar' is what picks up libs/plaud-sdk.aar
implementation fileTree(include: ['*.jar', '*.aar'], dir: 'libs')
implementation "org.jetbrains.kotlin:kotlin-stdlib:$kotlinVersion"
implementation "org.jetbrains.kotlinx:kotlinx-coroutines-android:$coroutinesVersion"
implementation "com.squareup.okhttp3:okhttp:$okhttpVersion"
implementation "com.squareup.okhttp3:logging-interceptor:$okhttpVersion"
implementation "com.squareup.retrofit2:retrofit:$retrofitVersion"
implementation "com.squareup.retrofit2:converter-gson:$retrofitVersion"
implementation "com.google.code.gson:gson:$gsonVersion"
implementation "com.google.guava:guava:$guavaVersion"
implementation "org.bouncycastle:bcprov-jdk18on:$bouncyCastleVersion"
implementation "org.java-websocket:Java-WebSocket:$javaWebSocketVersion"
implementation "org.slf4j:slf4j-api:$slf4jVersion"
implementation "com.github.tony19:logback-android:$logbackAndroidVersion"
implementation "com.jakewharton.timber:timber:$timberVersion"
// ...leave the rest of the generated block (capacitor-android, androidx, tests) as-is
}
```
And add the matching versions to `android/variables.gradle`:
```gradle theme={"system"}
ext {
// ...the generated Capacitor/AndroidX versions stay as they are
// Transitive dependencies of libs/plaud-sdk.aar
kotlinVersion = '1.9.25'
coroutinesVersion = '1.8.1'
okhttpVersion = '4.12.0'
retrofitVersion = '2.11.0'
gsonVersion = '2.11.0'
guavaVersion = '33.2.1-android'
bouncyCastleVersion = '1.78.1'
javaWebSocketVersion = '1.5.7'
slf4jVersion = '2.0.13'
logbackAndroidVersion = '3.0.0'
timberVersion = '5.0.1'
}
```
Lastly, point the native shell at your web app's URL. Set this in the root
`capacitor.config.ts` — that's the source of truth.
```typescript theme={"system"}
import type { CapacitorConfig } from '@capacitor/cli';
const config: CapacitorConfig = {
appId: 'ai.plaud.capacitordemo',
appName: 'Plaud Capacitor Demo',
// Required by Capacitor even when loading a remote URL; its contents are
// ignored at runtime because `server.url` is set below.
webDir: 'public',
server: {
// The native shell loads your deployed site and Capacitor injects the
// native bridge, so the plugin can reach iOS CoreBluetooth.
url: 'https://plaud-capacitor-demo.vercel.app',
cleartext: false,
},
};
export default config;
```
## Start Using Plaud Embedded in Your "Web App"
With Capacitor, your web app can stay a web app **AND be a native iOS app!**
Then, add the Bluetooth entitlement in `ios/App/App/Info.plist`
```xml theme={"system"}
CFBundleDevelopmentRegion
en
...
NSBluetoothAlwaysUsageDescription
Uses Bluetooth to connect and interact with peripheral BLE devices.
UIBackgroundModes
bluetooth-central
```
#### For Android
Declare all dependencies as the SDK does not come with a `pom.xml` file.
```gradle theme={"system"}
dependencies {
// Stock template says ['*.jar'] — '*.aar' is what picks up libs/plaud-sdk.aar
implementation fileTree(include: ['*.jar', '*.aar'], dir: 'libs')
implementation "org.jetbrains.kotlin:kotlin-stdlib:$kotlinVersion"
implementation "org.jetbrains.kotlinx:kotlinx-coroutines-android:$coroutinesVersion"
implementation "com.squareup.okhttp3:okhttp:$okhttpVersion"
implementation "com.squareup.okhttp3:logging-interceptor:$okhttpVersion"
implementation "com.squareup.retrofit2:retrofit:$retrofitVersion"
implementation "com.squareup.retrofit2:converter-gson:$retrofitVersion"
implementation "com.google.code.gson:gson:$gsonVersion"
implementation "com.google.guava:guava:$guavaVersion"
implementation "org.bouncycastle:bcprov-jdk18on:$bouncyCastleVersion"
implementation "org.java-websocket:Java-WebSocket:$javaWebSocketVersion"
implementation "org.slf4j:slf4j-api:$slf4jVersion"
implementation "com.github.tony19:logback-android:$logbackAndroidVersion"
implementation "com.jakewharton.timber:timber:$timberVersion"
// ...leave the rest of the generated block (capacitor-android, androidx, tests) as-is
}
```
And add the matching versions to `android/variables.gradle`:
```gradle theme={"system"}
ext {
// ...the generated Capacitor/AndroidX versions stay as they are
// Transitive dependencies of libs/plaud-sdk.aar
kotlinVersion = '1.9.25'
coroutinesVersion = '1.8.1'
okhttpVersion = '4.12.0'
retrofitVersion = '2.11.0'
gsonVersion = '2.11.0'
guavaVersion = '33.2.1-android'
bouncyCastleVersion = '1.78.1'
javaWebSocketVersion = '1.5.7'
slf4jVersion = '2.0.13'
logbackAndroidVersion = '3.0.0'
timberVersion = '5.0.1'
}
```
Lastly, point the native shell at your web app's URL. Set this in the root
`capacitor.config.ts` — that's the source of truth.
```typescript theme={"system"}
import type { CapacitorConfig } from '@capacitor/cli';
const config: CapacitorConfig = {
appId: 'ai.plaud.capacitordemo',
appName: 'Plaud Capacitor Demo',
// Required by Capacitor even when loading a remote URL; its contents are
// ignored at runtime because `server.url` is set below.
webDir: 'public',
server: {
// The native shell loads your deployed site and Capacitor injects the
// native bridge, so the plugin can reach iOS CoreBluetooth.
url: 'https://plaud-capacitor-demo.vercel.app',
cleartext: false,
},
};
export default config;
```
## Start Using Plaud Embedded in Your "Web App"
With Capacitor, your web app can stay a web app **AND be a native iOS app!**
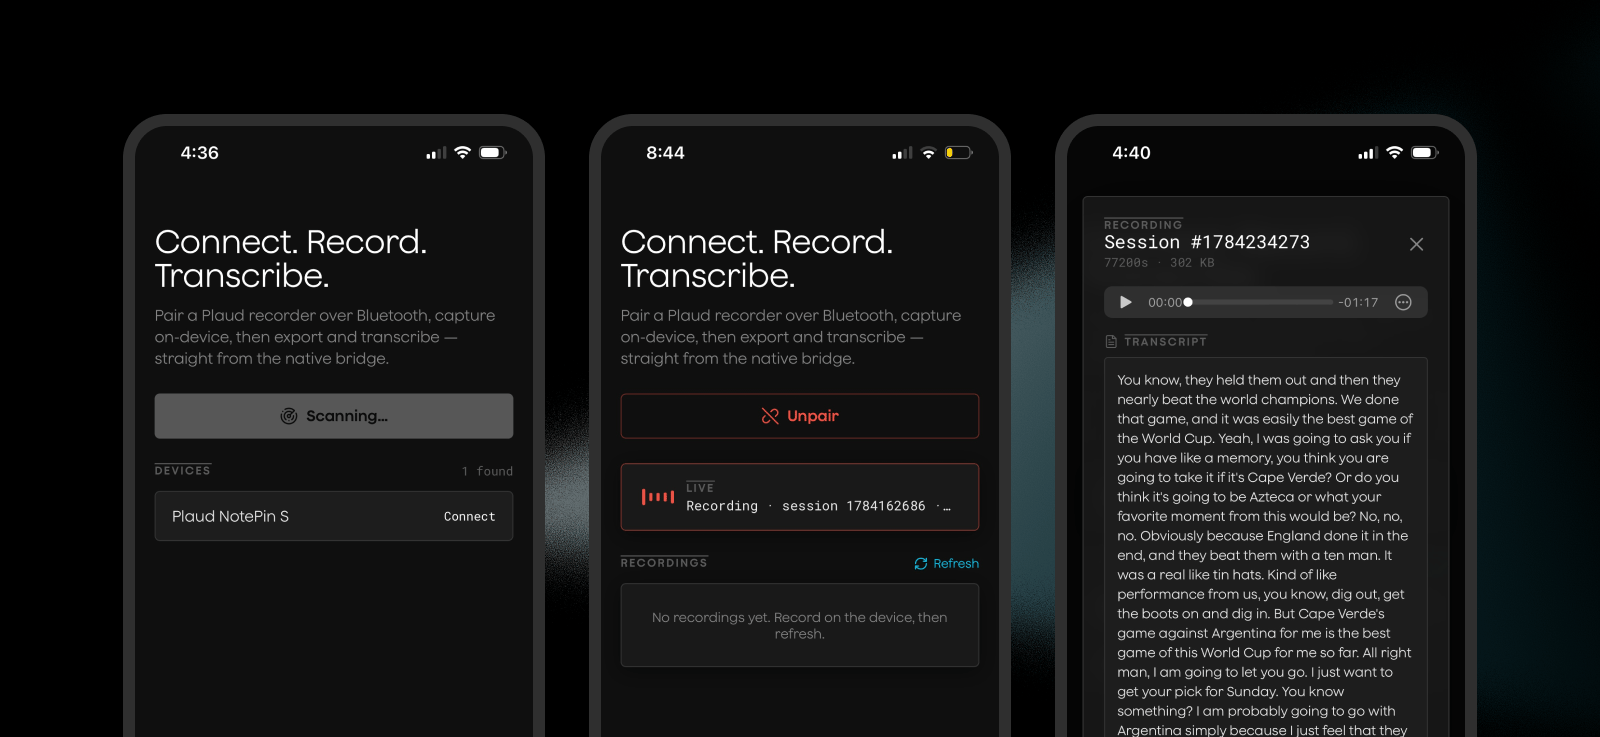 The key is to have mobile specific logic execute when your users are using a native mobile platform:
```typescript theme={"system"}
if (Capacitor.isNativePlatform()){
//Plaud SDK Logic
}
```
Use `plaud-sdk.ts` as a convenient typescript interface for interacting with the native iOS Plaud SDK, and write logic for connecting to devices, exporting audio, and triggering transcriptions directly from your web app.
```typescript theme={"system"}
import { Capacitor, type PluginListenerHandle } from "@capacitor/core";
import {
PlaudSdk,
readExportedFile,
type PlaudScanDevice,
type PlaudFile,
} from "@/lib/plaud-sdk";
const handleConnect = async (d: PlaudScanDevice) => {
setError(null);
if (!ensureNative()) return;
try {
setStatus(`connecting to ${d.name || d.serialNumber}…`);
await PlaudSdk.stopScan();
setScanning(false);
await PlaudSdk.connectBleDevice({ uuid: d.uuid, serialNumber: d.serialNumber });
} catch (err) {
setError(err instanceof Error ? err.message : String(err));
}
};
```
For the full list of relevant SDK methods for interacting with Plaud devices, see our [iOS SDK reference](/plaud-embedded/ios-sdk) and [Android SDK reference](/plaud-embedded/android-sdk).
The key is to have mobile specific logic execute when your users are using a native mobile platform:
```typescript theme={"system"}
if (Capacitor.isNativePlatform()){
//Plaud SDK Logic
}
```
Use `plaud-sdk.ts` as a convenient typescript interface for interacting with the native iOS Plaud SDK, and write logic for connecting to devices, exporting audio, and triggering transcriptions directly from your web app.
```typescript theme={"system"}
import { Capacitor, type PluginListenerHandle } from "@capacitor/core";
import {
PlaudSdk,
readExportedFile,
type PlaudScanDevice,
type PlaudFile,
} from "@/lib/plaud-sdk";
const handleConnect = async (d: PlaudScanDevice) => {
setError(null);
if (!ensureNative()) return;
try {
setStatus(`connecting to ${d.name || d.serialNumber}…`);
await PlaudSdk.stopScan();
setScanning(false);
await PlaudSdk.connectBleDevice({ uuid: d.uuid, serialNumber: d.serialNumber });
} catch (err) {
setError(err instanceof Error ? err.message : String(err));
}
};
```
For the full list of relevant SDK methods for interacting with Plaud devices, see our [iOS SDK reference](/plaud-embedded/ios-sdk) and [Android SDK reference](/plaud-embedded/android-sdk).